
The safety sensors on your garage door opener are a required federal safety feature, and when they malfunction, the door refuses to close as a protective response. Understanding what causes sensor failures helps you identify whether the fix is a quick alignment or a part replacement.
Since 1993, federal law has required all residential garage door openers sold in the United States to include photoelectric safety sensors. These sensors sit near the floor on each side of the door opening, typically 4 to 6 inches above the ground. One side sends an invisible infrared beam across the opening; the other side receives it. As long as the beam is unbroken, the opener will close the door normally. If the beam is interrupted or the sensors cannot confirm a clear signal between them, the opener stops the closing cycle and usually reverses the door or refuses to move it at all.
This system works well when the sensors are properly aligned and in good condition. Over time, however, sensors get knocked out of position, exposed to direct sunlight, coated in dirt or cobwebs, or simply fail from age and moisture exposure. The result is a door that reverses immediately after closing, a blinking opener light, or a door that will only close when you hold down the wall button manually. All of these point back to the sensors.
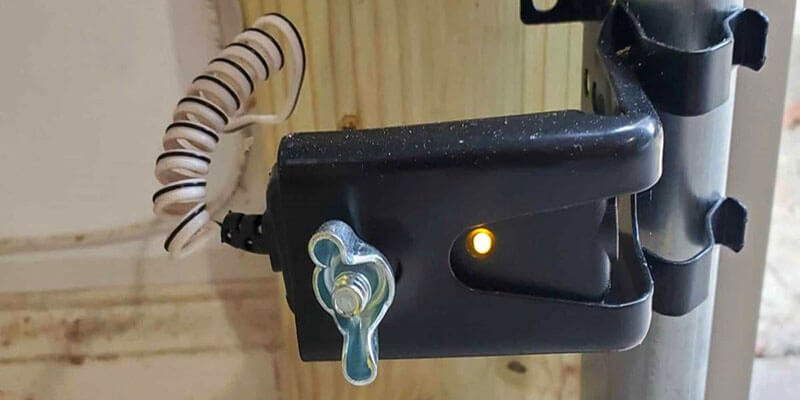
The most reliable way to identify a sensor issue is to look at the indicator lights on the sensor units themselves. On most LiftMaster, Chamberlain, and Genie openers, each sensor has a small LED. The sending sensor (usually the one with the yellow LED) should stay on solid. The receiving sensor (usually green) should also stay on solid when the beam is properly aligned. If either light is off, flickering, or blinking, the sensors are not communicating correctly.
A second test is the wall button behavior. Most openers respond differently when sensors are blocked versus when they are misaligned. If pressing and holding the wall button allows the door to close slowly while the opener light blinks, that is a sensor fault signal. The opener is giving you manual override capability while flagging that the automatic closing cycle is unsafe. On some models, the opener light blinks 10 times after a failed close attempt, which is the standard indicator code for a sensor obstruction or misalignment.

Sensor misalignment happens when one or both sensor brackets get bumped, bent, or shifted so the beam no longer travels cleanly from one unit to the other. This is the most frequently seen sensor issue in service calls across Seattle and Shoreline. The sensors are mounted on lightweight stamped steel brackets that are easy to knock out of position with a foot, a bicycle tire, or a trash can.
To check for misalignment, crouch down and look at both sensors. The receiving sensor should have its lens facing directly toward the sending sensor across the opening. If one sensor is pointed at the floor, the wall, or slightly past the other unit, the beam is not landing on the receiver lens correctly. Most sensor brackets use a wing nut that can be loosened by hand, which lets you rotate the sensor until the LED lights up solid. Retighten the wing nut firmly enough that the bracket will not shift again from a minor bump.
One sensor problem that confuses many homeowners is a door that works fine in the morning but refuses to close reliably in the afternoon. This is almost always caused by direct sunlight hitting the receiving sensor lens. When the sun is at the right angle, it floods the sensor with infrared light that overwhelms the signal from the sending unit. The receiver cannot distinguish between the beam it is supposed to detect and the ambient infrared from the sun, so it interprets the situation as an obstruction.
This issue is common in west-facing garages in Seattle during summer months when the sun is lower in the sky and shines directly into the garage opening in the late afternoon. The fix is usually a small visor or shade over the receiving sensor. Some technicians use a short section of cardboard or a purpose-made sensor shade hood. The goal is to block the ambient light from hitting the lens at an angle while still allowing the horizontal beam from the sending sensor to reach it. Repositioning the sensor slightly lower or angling it slightly away from the direct sun path can also help.
The plastic lenses on garage door sensors are exposed to the garage environment year-round. In Seattle’s damp climate, it is common for sensor lenses to accumulate a film of dust, oxidation, spider webs, or moisture condensation, particularly on the lower portions of the garage wall where air circulation is minimal. A dirty lens scatters the beam instead of transmitting it cleanly, which produces intermittent failures rather than a consistent malfunction.
Cleaning the lenses is straightforward. Use a soft, dry cloth or a cotton swab to wipe the lens face on both units. Avoid spraying any cleaner directly on the sensor, since liquid can work its way into the housing. After cleaning, test the door. If the problem was lens contamination, the LEDs will return to solid and the door will close normally. If the lights are still flickering after cleaning, the issue is mechanical or electrical rather than optical.
Each sensor connects back to the opener motor head via a thin white wire that runs along the door track and up to the ceiling. This wire is typically stapled or clipped to the track at regular intervals. Over time, the wire can be cut by a pinched track bracket, chewed by a rodent, pulled loose from a terminal connection, or simply corrode at the point where it connects to the opener unit.
A wiring fault often produces the same symptoms as a misaligned sensor, but realigning the sensors does not resolve it. If you have confirmed that both sensor LEDs are solid and the lenses are clean, check the wiring path from each sensor back to the opener. Look for any point where the wire is pinched, frayed, or disconnected. At the opener end, the sensor wires connect to labeled terminals, usually marked “white” and “white/white” or with sensor icons. A loose terminal connection is easy to re-seat. A cut or corroded wire section needs to be spliced or replaced. For most residential openers, the sensor wire is standard 18-gauge two-conductor wire available at hardware stores.
Sensors that are physically damaged, have a cracked housing, show water infiltration inside the lens, or continue to malfunction after alignment and wiring checks are verified need to be replaced. Sensors are model-specific in some cases, though many opener brands use sensors that are interchangeable across model years. A LiftMaster 41A5034 sensor set, for example, is compatible with a wide range of Craftsman and Chamberlain openers from the same platform.
Sensor replacement is a straightforward job. The old sensors are unclipped from the brackets, disconnected from the wire terminals, and the new units are wired in and aligned. On a typical residential door in Bothell or Bellevue, the process takes 20 to 30 minutes. The new sensors should be tested with multiple closing cycles and with a deliberate obstruction test (passing a box through the beam path while the door is closing) to confirm the reversal function works correctly before the job is considered complete.
One important note: the door should never be operated in a mode that bypasses the sensors permanently. Holding down the wall button to close a door with failed sensors is an acceptable temporary measure to secure the garage while waiting for a repair, but it should not become a routine workaround. The sensors exist because a descending garage door exerts enough force to seriously injure a person or animal that is struck by it. If the sensors need replacing, replacing them promptly is the right call.
Not every door that fails to close is a sensor issue. Before concluding the sensors are at fault, it is worth ruling out a few other common causes. A garage door that reverses immediately on the way down with no sensor light issues may have a limit switch or force setting that needs adjustment on the opener. A door that stops partway down may have a track obstruction, a broken cable, or a binding roller. A door that makes a grinding sound and then stops is more likely a mechanical issue than a sensor problem.
The clearest indicator that sensors are responsible is this: the door reverses the moment it begins to close, the opener light blinks a set number of times, and the door will close when you hold down the wall button manually. That specific combination of symptoms points directly to the sensor circuit. If the door reverses only at a certain height, or if it stops and stays stopped rather than reversing, the diagnosis is more likely elsewhere. See our related articles on broken garage door cables and off-track door repair for those scenarios.
CHS Garage Repair handles sensor alignment, wiring repairs, and sensor replacement for all major opener brands in Seattle and surrounding areas. Our technicians carry replacement sensors on the vehicle and provide a written estimate before any work begins.